How to build an academic website
This is a step-by-step tutorial of how to build an academic website hosted on GitHub pages (or step-by-step demonstrations of how I did it).
Step 0. Prerequisties
- You must have a GitHub account.
- Download GitHub Desktop in your local machine (laptop or desktop).
- You must have a template repository in mind. I used this as my template. All credits to amazing Pascal Michaillat !
Now, let’s start building your website!
Step 1. Fork the template
First step is to fork the template repository.
How to fork?
- Go to the template repository
- Click
Use this templatebutton (the green one!) on the top right - Then, click
Create a new repository
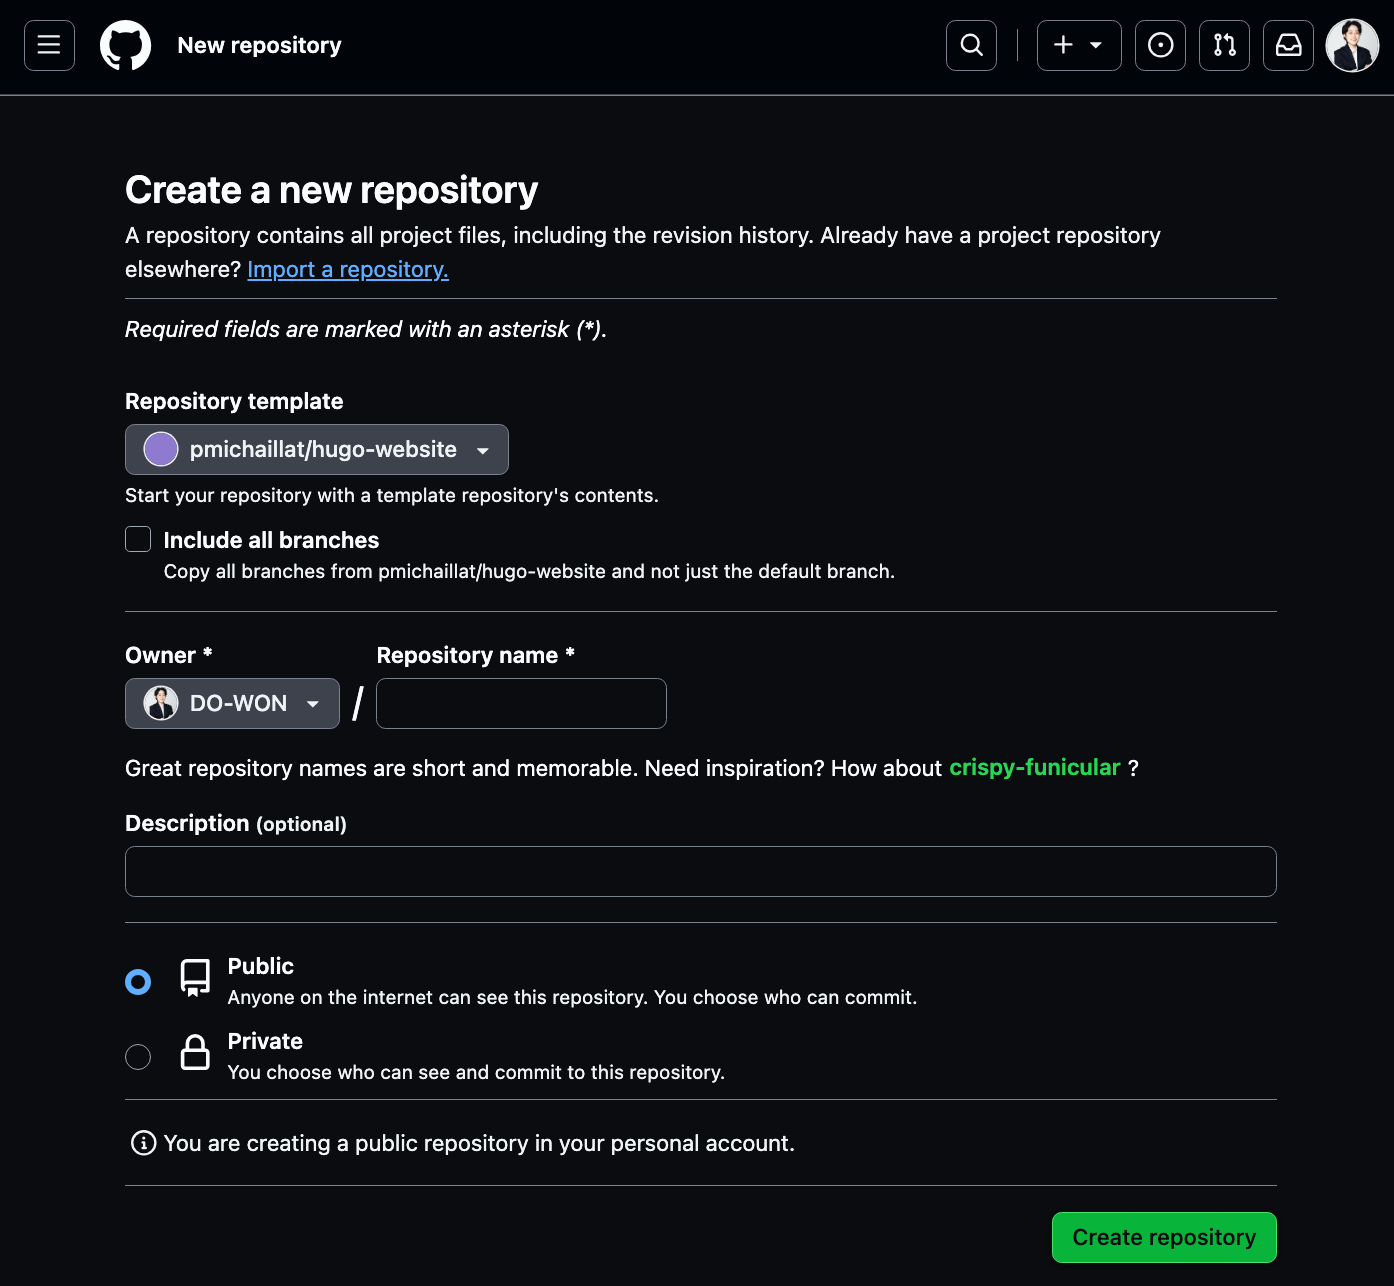
Now, you will see the following page:

- In the
Repository namesection, you must put in<your GitHub owner name>.github.io. For example, in my case, it’sDO-WON.github.io. - Then, click the green
Create repositorybutton below.
Step 2. Clone the forked repository to the local machine
It is good to work from your local machine and then commit and push changes to your GitHub repository.
- Go to the forked repository
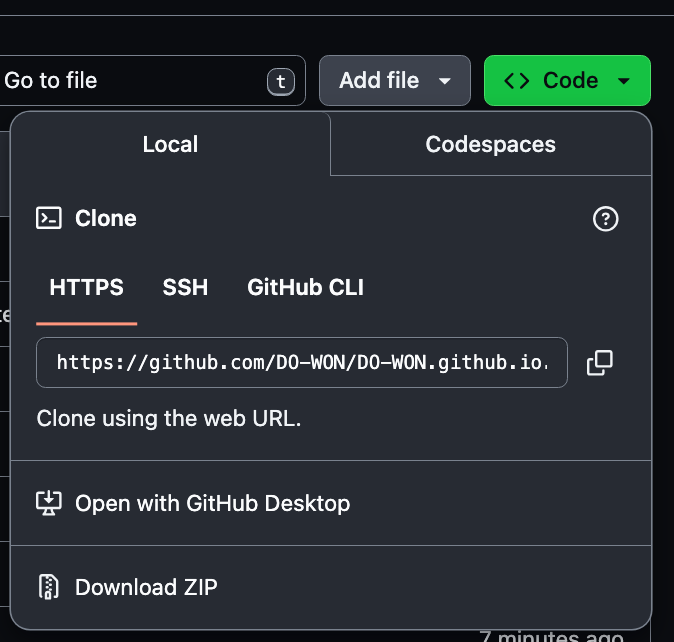
- Click the green button on the top right
<> Code - You will see
Localas follows:
- Click
Open with GitHub Desktop - Choose local path (on your laptop/desktop)
- Click the
Clonebutton in the bottom right
Step 3. Install Hugo
Install Hugo . If you use Mac, you can install Hugo by running the following code in your terminal:
brew install hugo
Step 4. Setting up config.yml
Next step is to make changes in your local machine. The first thing you need to change is the config.yml file.
- Open the repository on your local IDE (e.g., VS Code, PyCharm, etc.)
- You can open it using GitHub Desktop (please refer to this link )
- On your IDE, open
config.ymlfile - Change the
baseURL. For me, I putdo-won.github.ioas thebaseURL. You should put your own GitHub username instead ofdo-won.
Step 5. Update your website!
Since you have made some changes on your local machine, now it’s time to update your website.
Development stage
While you develop (make changes, testing those changes, make further changes … ), you could check how the changes you made look like on your local environment. In the terminal of your IDE (whereever you are working on), try running the following code:
hugo server
 Then, click the
 http://localhost:1313/ to check how your website looks like. This is very useful since it takes some time to compile, render, and deploy all the changes on GitHub. In the development stage, use Hugo to automatically reflect changes made locally and rebuild the website.
If you want to stop running hugo server, enter contorl+C on your terminal.
Compiling and deploying
After you checked how the changes made look like with Hugo server, and finished making all the changes you needed, you are now ready to deploy those changes on your website.
First, run hugo in your IDE terminal of your repository.
hugo
This command compiles everything that needed to deploy the changes to your website.
Then, using your IDE or GitHub Desktop, commit and push changes to your online repository.
Wait till the deployment is completed and visit your website!
Next steps
Now you know how things work, you can make further changes in your local machine and deploy them.
Please refer to this page for further customization!